Pomoc
- Basics
- Applications
- Employee
- Planned Schedule
- Executed schedule
- Notifications
- Reports
- Company
- Manager duties
- Other
Work planning
Inserting the planned work into the schedule can be done in 3 ways:
- Inserting a job for several employees in a period of time - the command over the schedule "Generate schedule"
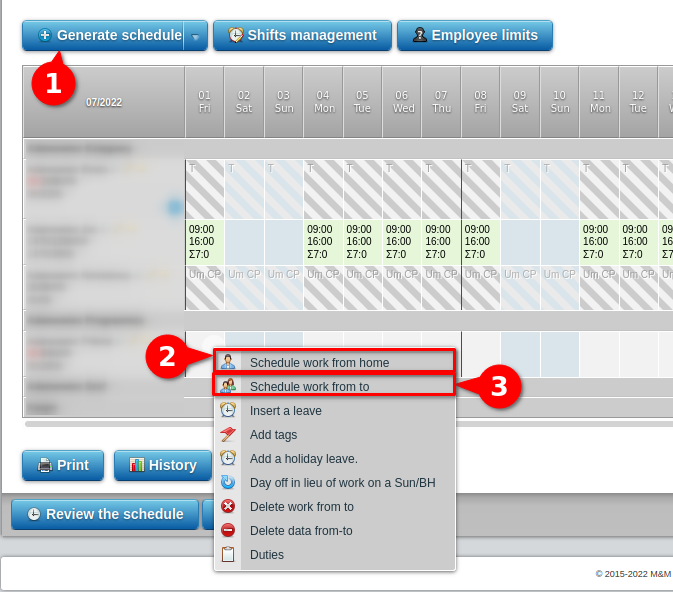
- Inserting a job for one employee in one day - the "Schedule a job for a day" command from the context menu (we get the menu by right-clicking on the cell)
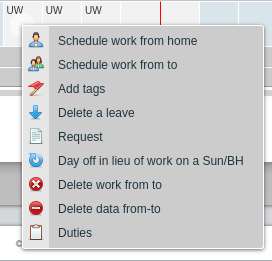
- Inserting a job for one employee in a period of time - the "Schedule work from-to" command from the context menu (we get the menu by right-clicking on the cell)
To do:
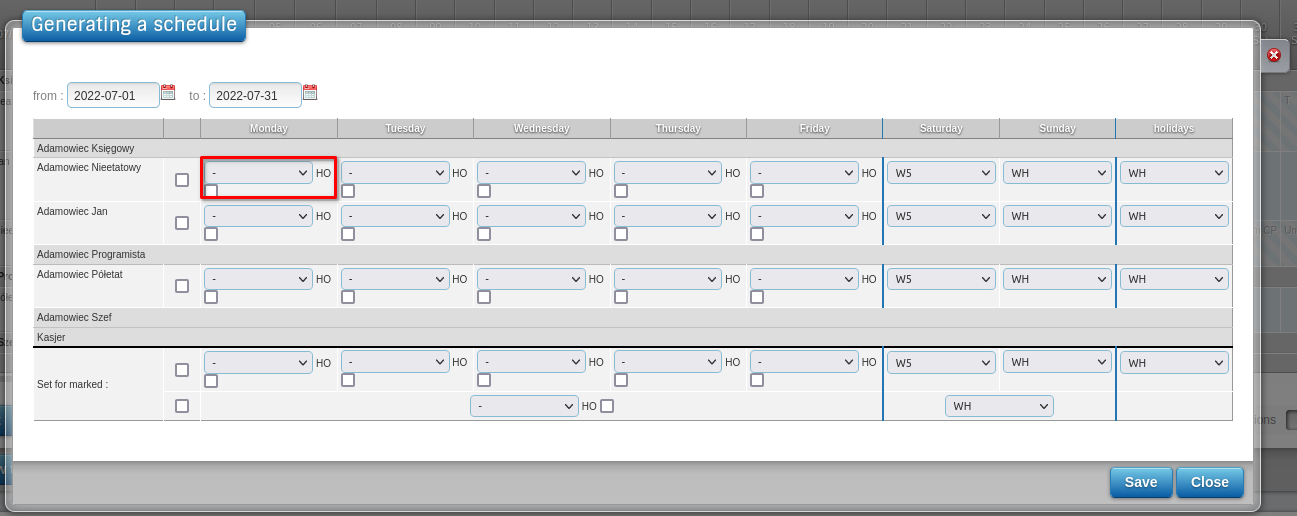
- 1Generate schedule
-
The quickest method is to use the "Generate schedule" function (the button above the schedule), as this function allows post a job for all employees throughout the month. Whatever function we will use, if on a given day there will be absenteeism, work will not be introduced.
- 2Plan work at the day
-
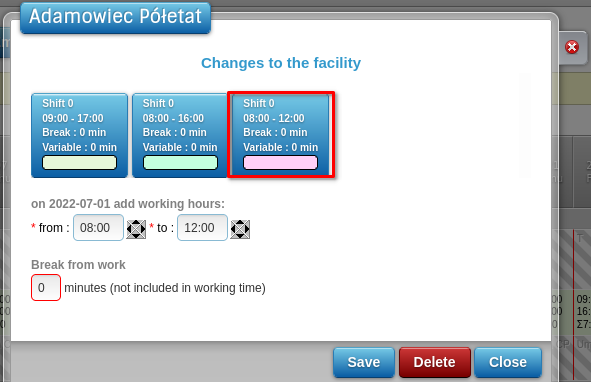
To enter working hours only on a selected day, click Schedule work on a day. After click a screen for entering work hours will appear, in which you must enter the start and end times and click Save.
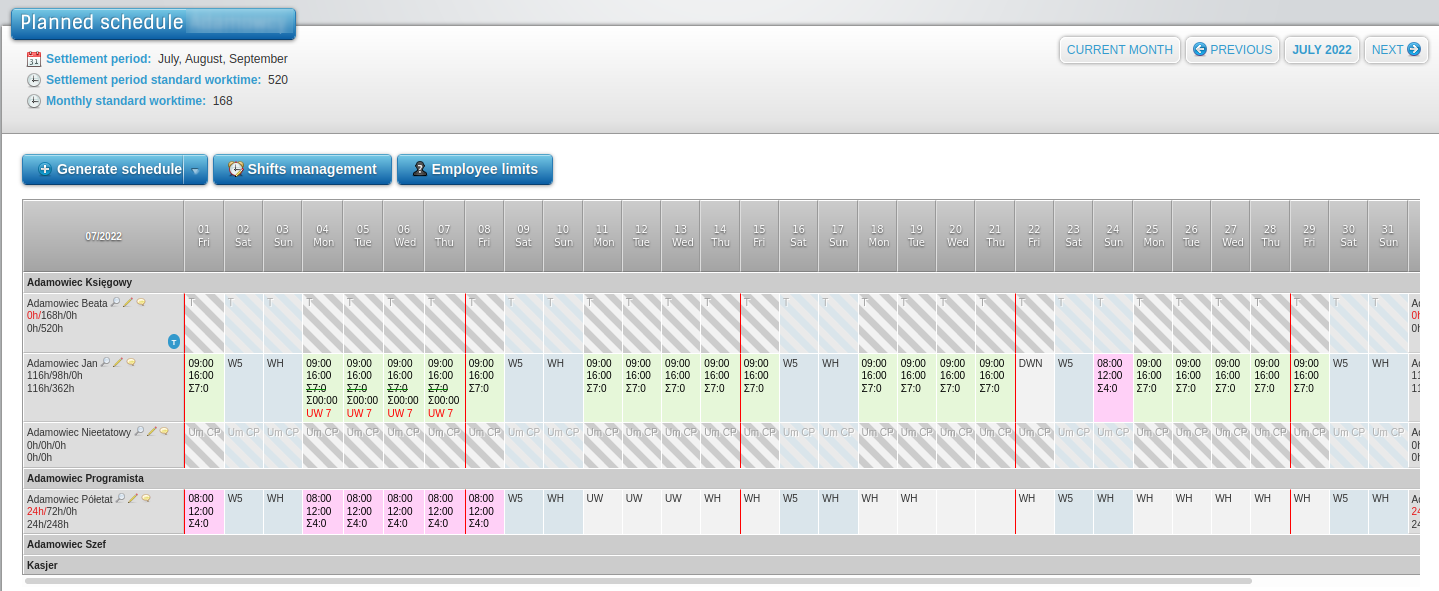
 The planned schedule shows the employee's working hours and their sum.
You can also enter working hours with one click if the company has defined changes in the application
most common in the organization (see Object Changes).
The planned schedule shows the employee's working hours and their sum.
You can also enter working hours with one click if the company has defined changes in the application
most common in the organization (see Object Changes).
- 3Schedule work from-to
-
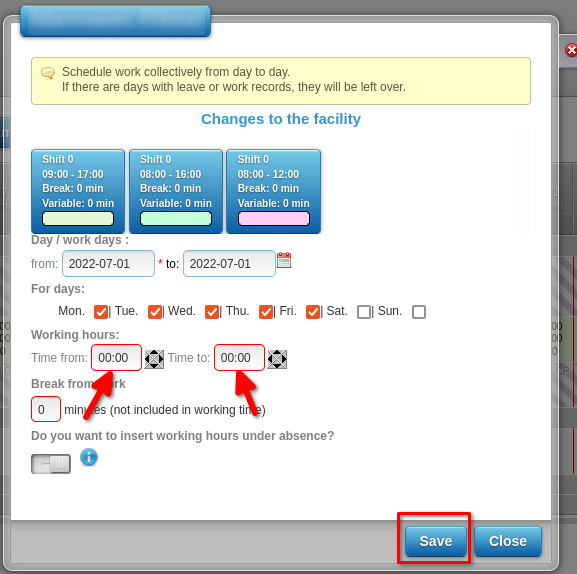
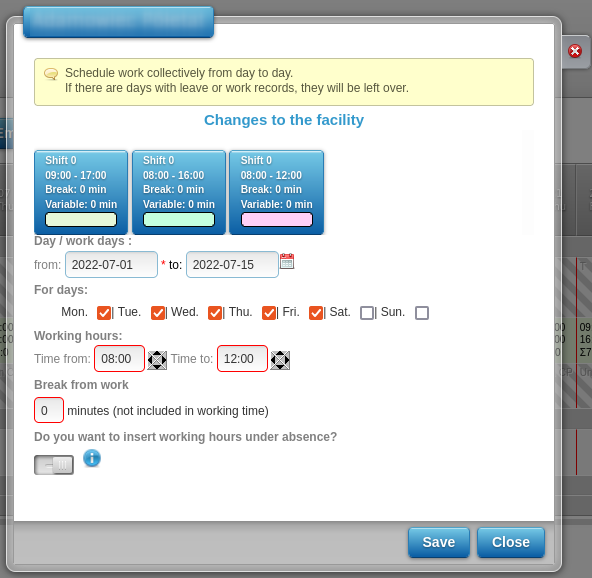
To enter the same working hours in the selected date range, click Schedule work from-to After clicking, a screen for entering working hours will appear, in which you should select:
- Date range
- Relevant days of the week
- Hour of commencement and completion of work
- The number of minutes of break not included in working time
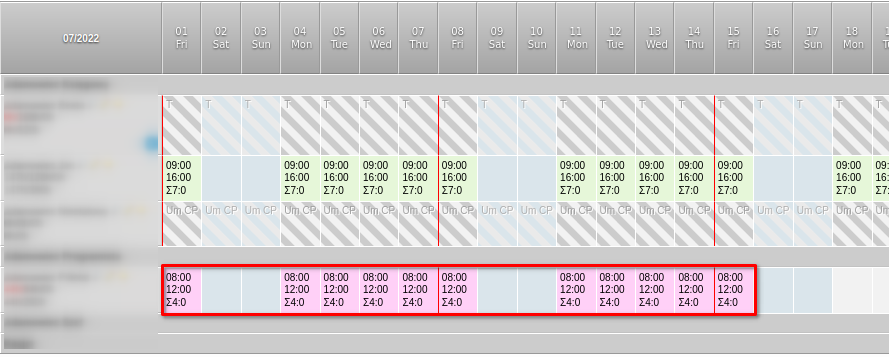
 The entered working hours appear on the schedule planned in the previously selected date range and days of the week
employee and their sum.
The entered working hours appear on the schedule planned in the previously selected date range and days of the week
employee and their sum.
- 4Removal and modification of working hours before artwork approval
-
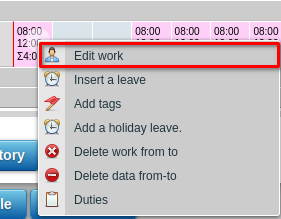
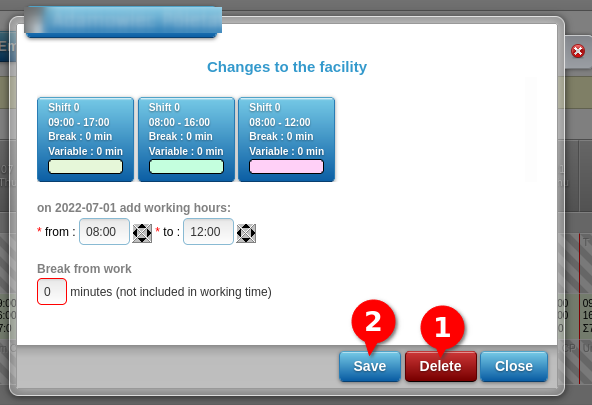
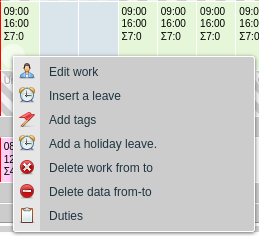
To change the previously entered working hours, right-click on the day square and select Edit work.
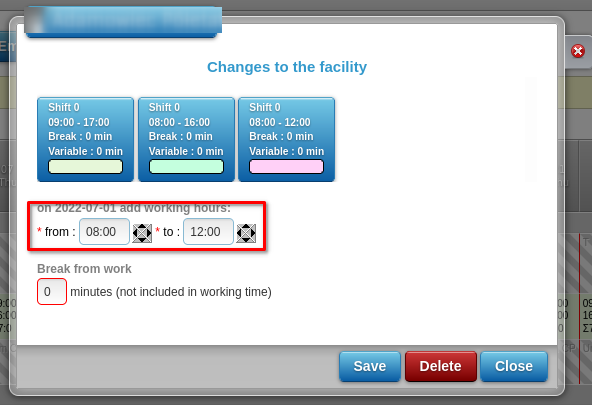
 On the edit screen, change the working hours, and then click Save to enter it on the planned timesheet
there are new working hours.
On the edit screen, change the working hours, and then click Save to enter it on the planned timesheet
there are new working hours.
 To delete previously entered working hours, right-click on the day square and select
Edit work.
To delete previously entered working hours, right-click on the day square and select
Edit work.
 On the edit screen, click Delete and then Save, and the hours will be entered in the planned schedule
deleted.
On the edit screen, click Delete and then Save, and the hours will be entered in the planned schedule
deleted.
 ATTENTION! If the working hours were entered via the Add work from-to function, then when modifying or
When removing, the operation will be performed only on one day (previously selected for modification). Other days
previously entered in the from-to sequence will remain unchanged.
ATTENTION! If the working hours were entered via the Add work from-to function, then when modifying or
When removing, the operation will be performed only on one day (previously selected for modification). Other days
previously entered in the from-to sequence will remain unchanged.
- 5Enter absenteeism - adding planned absences
-
If we have information that in the next month an employee from the team will have absences such as:
- vacation leave
- childcare (Article 188 of the Labor Code)
- occasional leave (e.g. on the occasion of a wedding)
- long sick leave that began on the schedule planning date and will last for the planned one month
- parental or maternity leave
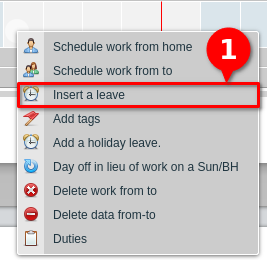 Calling this command will open a window with the option of choosing the type of absenteeism and duration.
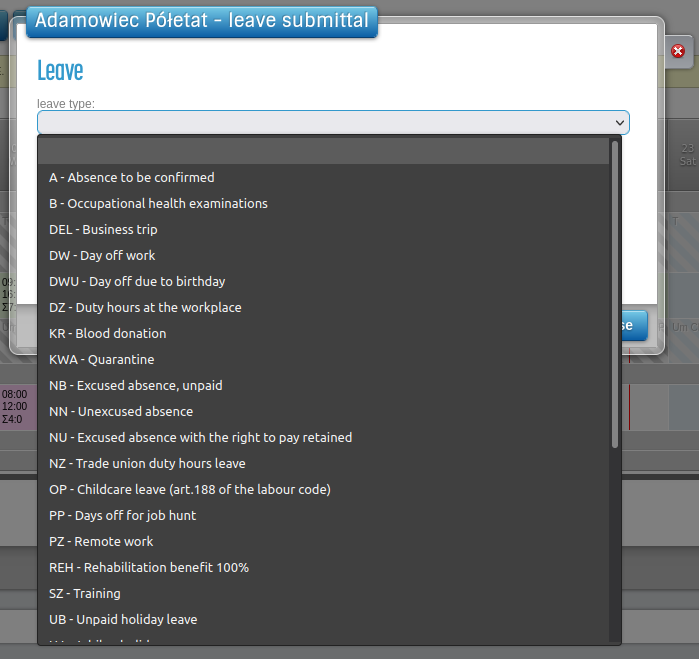
 From the drop-down list, select the type of absenteeism of the employee, e.g. vacation leave.
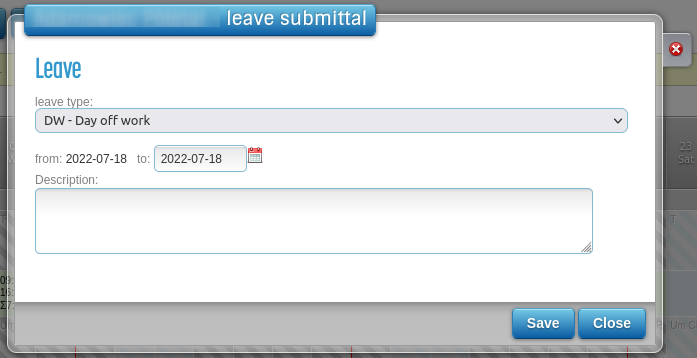
 If the planned absence is longer than one day, you can enter the end date on the level of this screen
absenteeism.
The date has always been set to the day on which we caused the absences. We cannot insert an absenteeism earlier than
the day from which we start, but we can enter this absence as a period ahead of the calendar.
To confirm the entered absenteeism, click Save.
If the planned absence is longer than one day, you can enter the end date on the level of this screen
absenteeism.
The date has always been set to the day on which we caused the absences. We cannot insert an absenteeism earlier than
the day from which we start, but we can enter this absence as a period ahead of the calendar.
To confirm the entered absenteeism, click Save.
 The selected absenteeism will be entered on the schedule planned in the previously selected date range.
 Absence may be introduced:
- on days without work - then the working time will always be deducted from 8 hours times the full-time job (see fig., an employee of Pawłowska Barbara) full-time - leave on 03-07 / 12 caused a reduction in the amount of the month by 20 hours (5 x 8h x ?). The month of December 2018 is 152 x ? full time = 76 minus 20 - individual employee time = 56
- on days with work - then the number of hours will be deducted from the time and hours worked then work - see picture, employee Król Zofia full-time - leave on 07/03/12 resulted in a reduction in the of the month by 50 hours (5 x 10h of work x 1/1 full-time job) - December 2018 is 152 minus 50 - individual employee dimension = 102
- 6Removal of absence prior to approval of the graphic designer
-
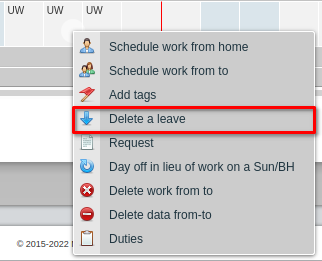
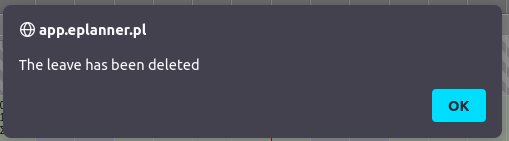
To remove the absenteeism entered earlier, right-click on the square of the day and select the option Remove absenteeism. The system will inform you that the absenteeism has been removed and the absenteeism marker will disappear from the schedule planned.
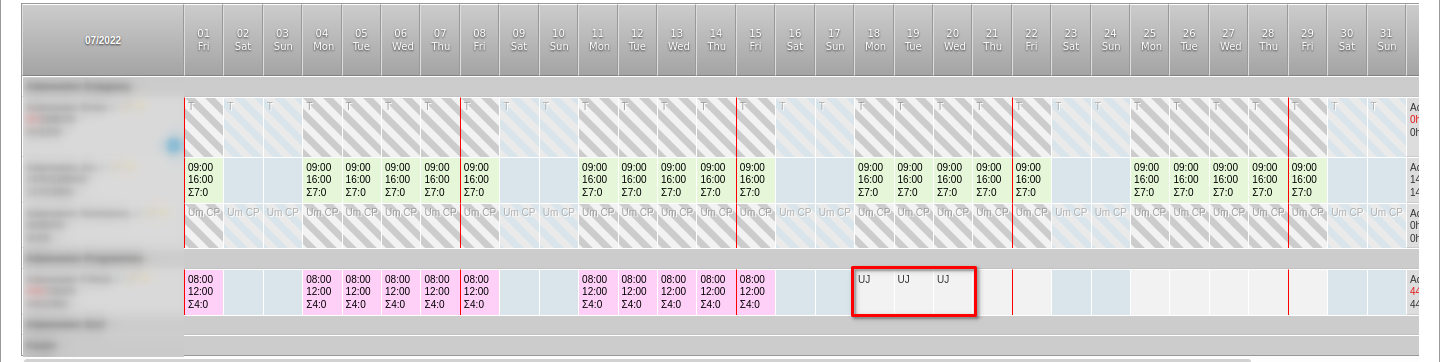
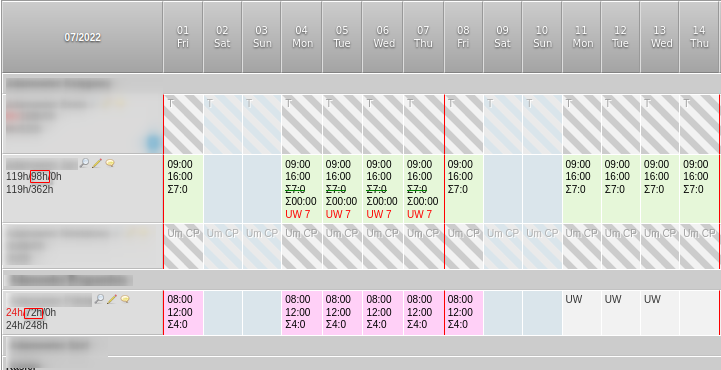
 Attention !!! If the absenteeism was introduced for a few days as shown in the picture, the
all days of the introduced absence, not just the selected day.
Attention !!! If the absenteeism was introduced for a few days as shown in the picture, the
all days of the introduced absence, not just the selected day.
- 7Generating an application for absenteeism for printing
-
After entering the absenteeism on the schedule, the user can use the Request option to generate an absenteeism request.
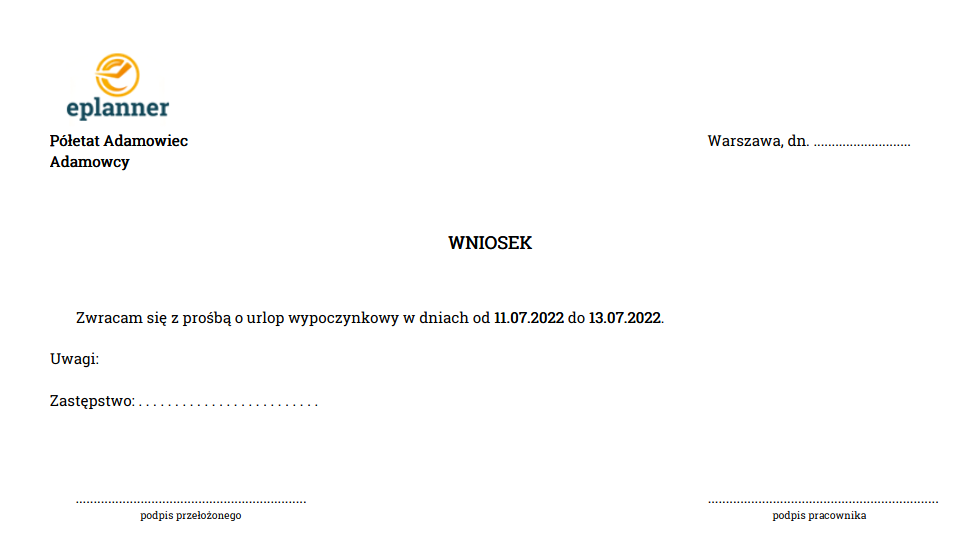 The application prepared in this way is ready for printing. For companies that use the workflow of paper applications for
absence is a great help.
The application prepared in this way is ready for printing. For companies that use the workflow of paper applications for
absence is a great help.
- 8Add markers - mark holidays in a schedule
-
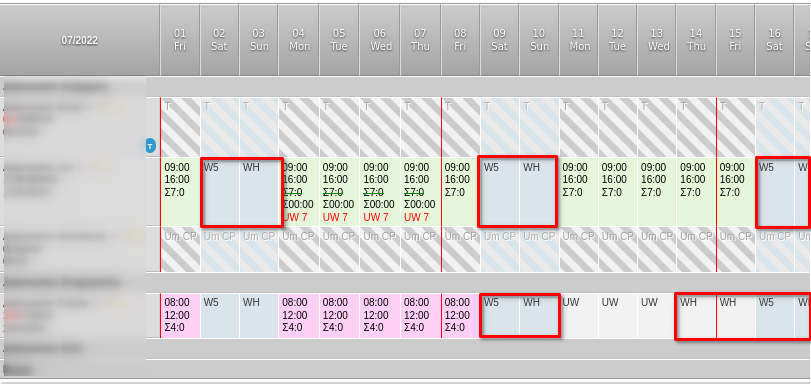
Each day off in the planned schedule should be marked with an appropriate marker.
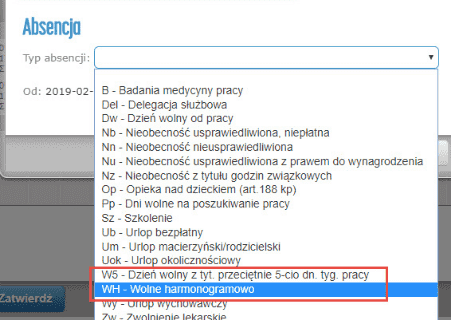
- DH - a day off with harmonica
- W5 - an average 5-day working week/li>
- With the Generate schedule function, it is possible to insert the DH and W5 markers in addition to working hours.
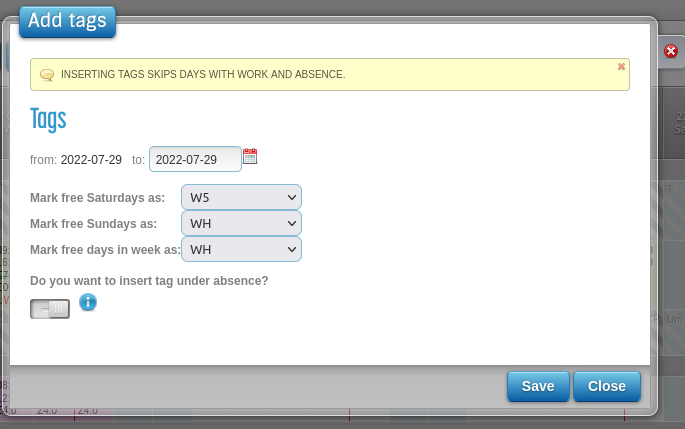
- Tags can also be added by selecting " Add Tags " from the context menu.
 This function allows you to select the period in which to insert markers (max. 1 month) and offers automatic
inserting the W5 marker on free Saturdays and DH on weekdays and Sundays. He ignores all of them in his actions
days with planned work and possible absences.
This function allows you to select the period in which to insert markers (max. 1 month) and offers automatic
inserting the W5 marker on free Saturdays and DH on weekdays and Sundays. He ignores all of them in his actions
days with planned work and possible absences.
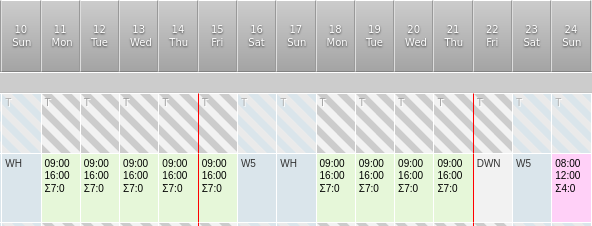
 Schedule with inserted markers (fig.):
 If we want to add these tags on days other than the default, we can use the "Add absence" function.
- It is also possible to insert markers on any day by using the "Add absence" function it also shows the markers in the absenteeism code list.
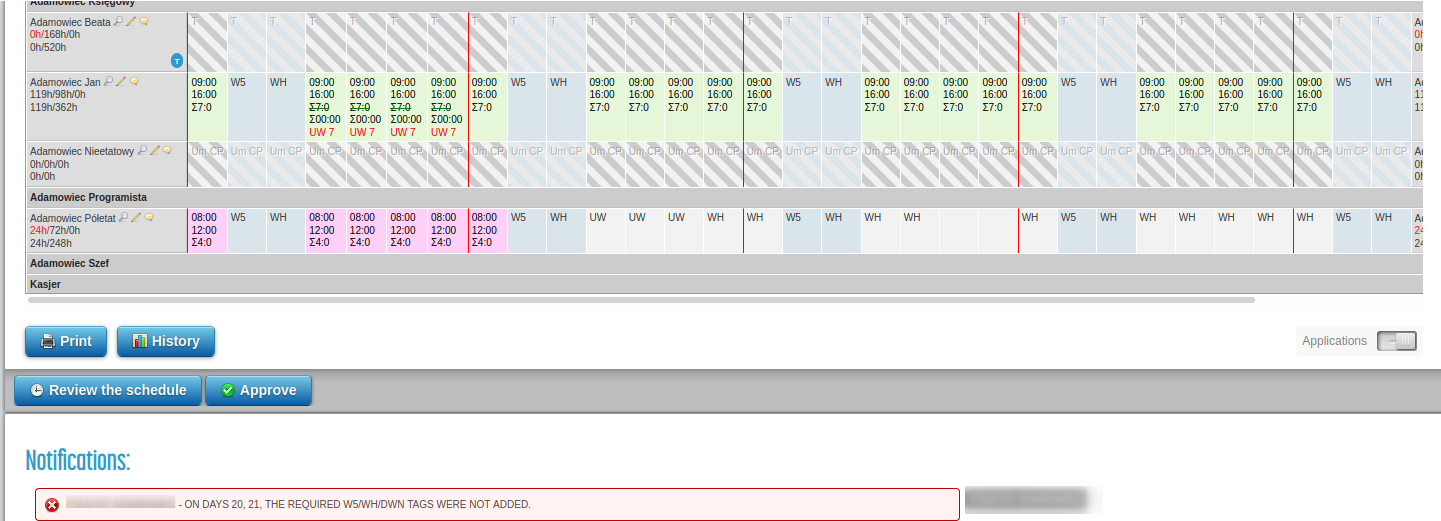
 Adding work for an employee without inserting any markers and then Recalculating the schedule will generate
mistakes.
Adding work for an employee without inserting any markers and then Recalculating the schedule will generate
mistakes.
 An example of a graphic without tags and a message after calling "Recalculate the schedule":
- 9Inserting a day off for work on S / Holiday
-
If the employee is scheduled to work on Sunday during the accounting period, then in accordance with the regulations Of the Labor Code, the employee should be provided with another day off within 6 calendar days preceding or following such Sunday (Article 151 [11] §1 of the Labor Code). An employee working on a Sunday should use a Sunday free at least once every 4 weeks (Art. 151 [12] of the Labor Code). To enter a day off for work on Sunday, click the context menu option Journal. free for work at S / Holiday
 Then, on the screen, select Sunday (or holiday) from the drop-down list, which will be compensated by the day
free (the system suggests all Sundays and holidays on which we have planned the work of the employee), and then
click Save.
Then, on the screen, select Sunday (or holiday) from the drop-down list, which will be compensated by the day
free (the system suggests all Sundays and holidays on which we have planned the work of the employee), and then
click Save.
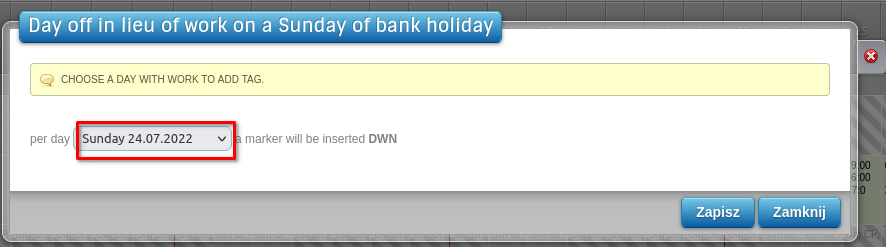
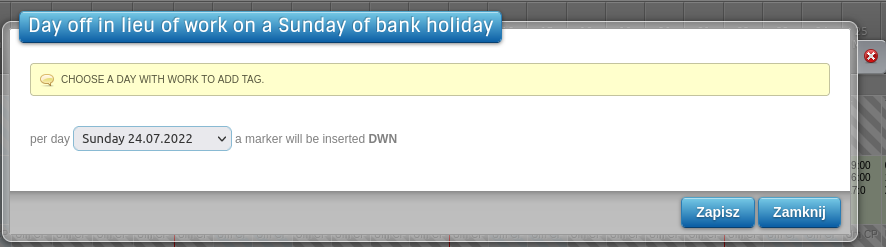 A day off for work on Sunday / holiday will be introduced on the planned schedule.
- 10Accounting week
-
The red lines separating the days in the planned schedule are the marker of the week in a given settlement period. This between these days, the application checks the provisions of the labor code (e.g. weekly rest). In the figure below, the accounting period started on Tuesday, January 1, so every week until the end of March accounting started on Tuesday and ended on Monday.